How To Customize WooCommerce Product Page Easily without Coding
If you are looking on how to Customize WooCommerce Product Page easily without coding.
Want to create the best product page without paying $$$$ to Developers or agencies.
Then in this tutorial, we are going to show you the easiest and best method to customize the Product Page the way you like.
You can customize it in 3 ways, using these methods:-
- Elementor Pro
- GloriousThemes Services
- Woolentor
Disclosure: I may receive affiliate compensation for some of the links below at no cost to you if you decide to purchase a paid plan. You can read our affiliate disclosure in our privacy policy.
1. Using Elementor Pro
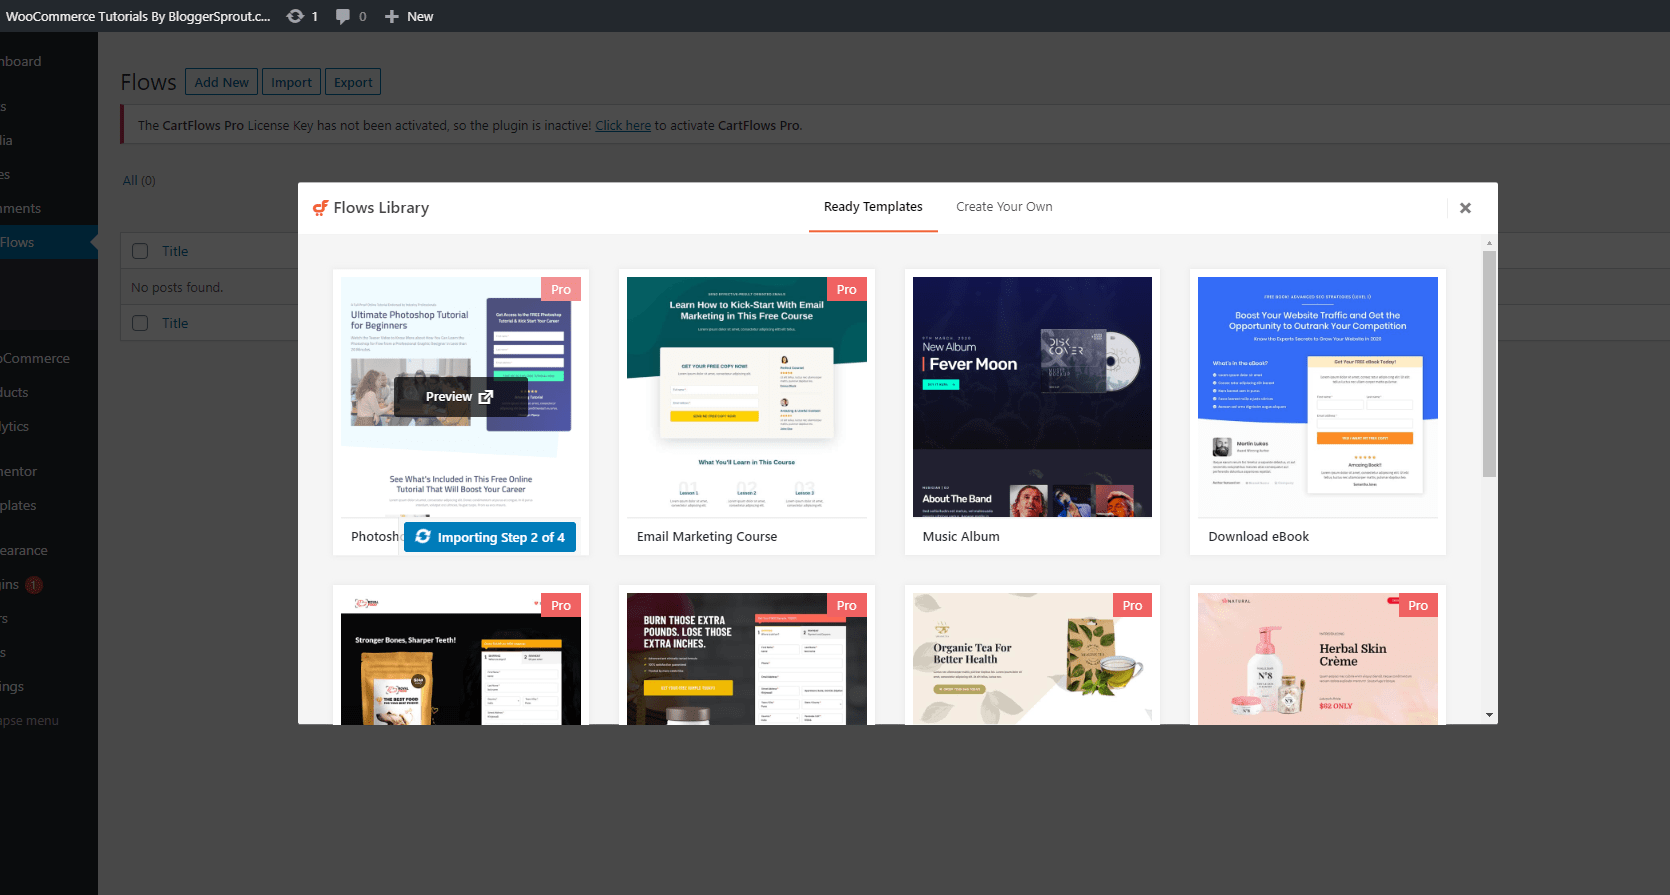
You can fully customize the WooCommerce Product page without coding and style it the way you want using the Elementor Pro plugin.
Elementor is a Drag and Drop page builder plugin that is currently the #1 WordPress Page Builder Plugin.
It comes in 2 variants:- Free and Pro.

The Free version is really good for normal page building but it misses the features you will require for customizing the Product page in WooCommerce.
So, Elementor Pro is required which is the only plugin you need to buy to design the product page.
So, Lets get started.
You can Save your time by watching the Video Tutorial
Step 1: Download the Plugin
The first step is to download the plugin. You need to purchase Elementor Pro from the official website, which you can visit by clicking here –> Elementor Official Website.
Once you have purchased the Premium version of the plugin and have the license key. You need to install the plugin in your WordPress.

Go to the Admin section of your WordPress website:-
- Go to www.yourwebsite.com/wp-admin
- Login and navigate to Plugins > Add New > Search
- Search for Elementor, Click on Install and Activate it.
- Now Again, go to Plugins > Add New > Upload.
- Upload the Premium Version of Elementor and Activate it.
You have now successfully installed and activated the Elementor Pro plugin and is ready for use.
In the next step, we will create the New Product Page for WooCommerce using Elementor.
Step 2: Creating the Product Page
The Next step is to create the Product page using Elementor Pro. Now it depends on you which type of product page you want to create.
There are 2 types of product page:-
- Archive Product Page
- Single Product Page
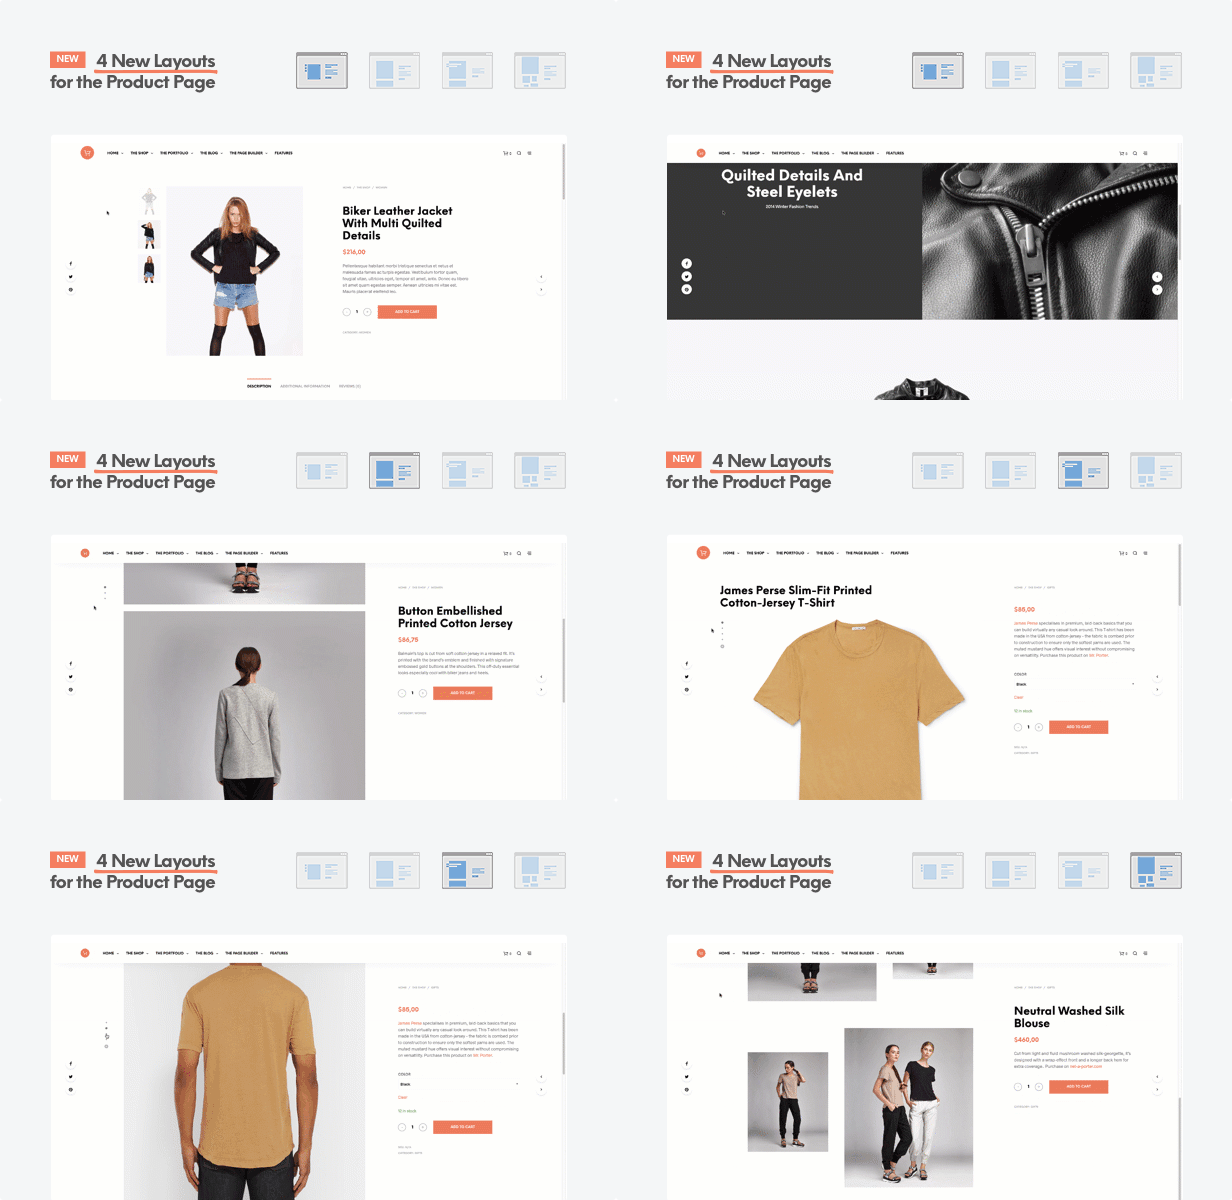
Archive Product Page: This page is used to display all the products from woocommerce. Just like the shop page.
Single Product Page: This page is used to display a single product. Example: https://GloriousThemes.com/themes/nihal .
The process of both the page is same. So in this tutorial, we will create a Single Product Page to display our product in a different style.
To create a Product Page:
- Go to /wp-admin.
- Then navigate to Templates > Theme Builder.
- From the left side of the sidebar.
- Next Choose the Single ( From tabs ) and Put a Name.
- I suggest “Product Single” and then create the page.
Now your Product page is created, But its empty and has no design or functionality. We will design the page and add the widgets to show your products title, price and all necessary things.
By the way, If you are facing a problem in designing your product page. You can hire GloriousThemes.com WordPress Services and they will do all the work the way you want.
Step 3: Designing the Page
Designing the page with Elementor Drag and Drop is really simple and easy. All you need to do is drag the elements for your page to the way you like.
Add the colors and the page style or use a template pre-created for Elementor Pro users.
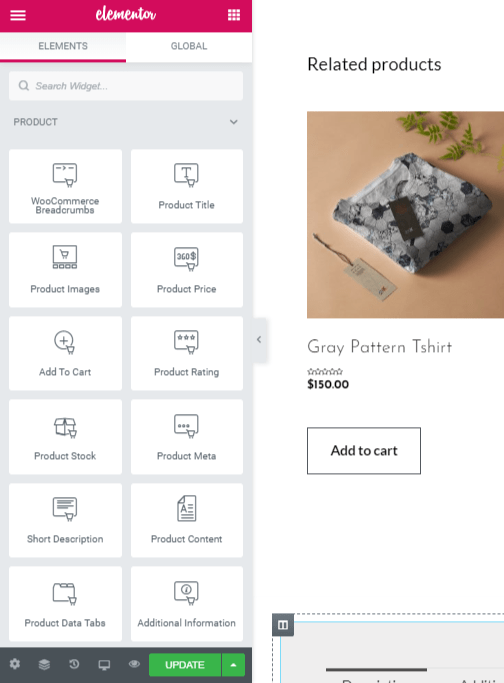
The next step is to add the woocommerce widgets from Elementor Blocks.
In Elementor, you will find the woocommerce block tabs, these are the widgets that we are going to use to add functionality to our Product Page. This widget will help you easily customize woocommerce product page layout just by dragging and dropping.
[optin-monster-shortcode id=”a9hjmpjcuohk0eabddi5″]
To Customize woocommerce product page template or design a product page is similar. The only difference is that while customizing the product page template, you have to do it by code or start from scratch.
But in designing, you can edit using elementor as many times you like.
Step 4: Adding the Widgets
Elementor WooCommerce Block library has all the functionality and widgets you will need for your product page.
As now you have designed the page that you want to use as your product page, Now Drag and Drop the widgets like the:-
- Product Title
- Product Category
- Product Description
- Product Pricing
- Product Images & Gallery
- Product Tabs
- Product Breadcrumbs
- Product Ratings
- Product Short Description
- Add to Cart
- Products related
- Upsells
Once you have add all the widgets to the right place. Click on Save Changes.
Step 5: Previewing the Page with Another Product
While Designing and Adding the widgets, Elementor by default picks a product from woocommerce and shows you the output.
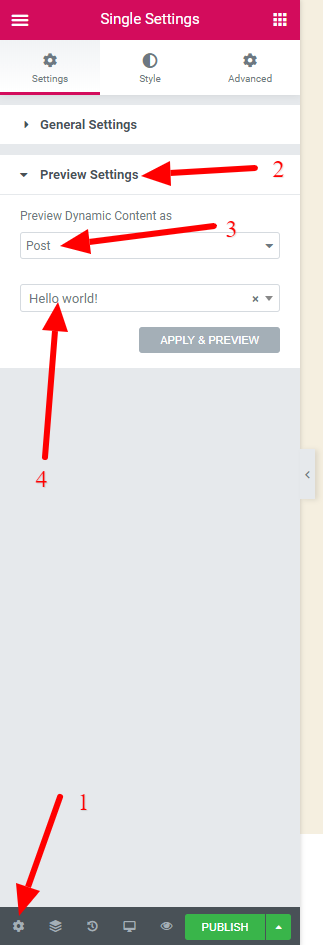
Now we will change the product. And to do so, we will do it in 4 steps:-
- Click on Settings “the Gear icon“.
- Select the Preview Settings
- Choose WooCommerce.
- Select another WooCommerce Product.
That’s how you want to change the product for viewing if your product page is working perfectly.
Step 6: Set the Conditions
By setting the page condition, you will make woocommerce use this new page you created for your single products.
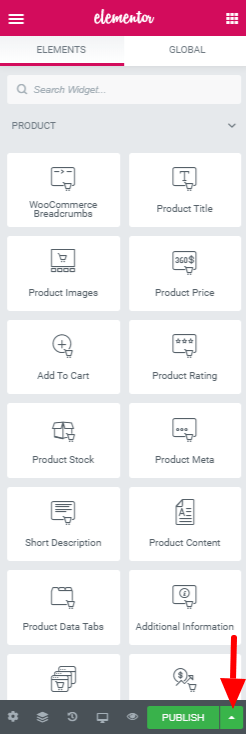
To set the condition of the page click on the arrow icon, near the publish button.
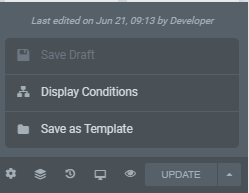
Next choose the Display conditions from the popup.
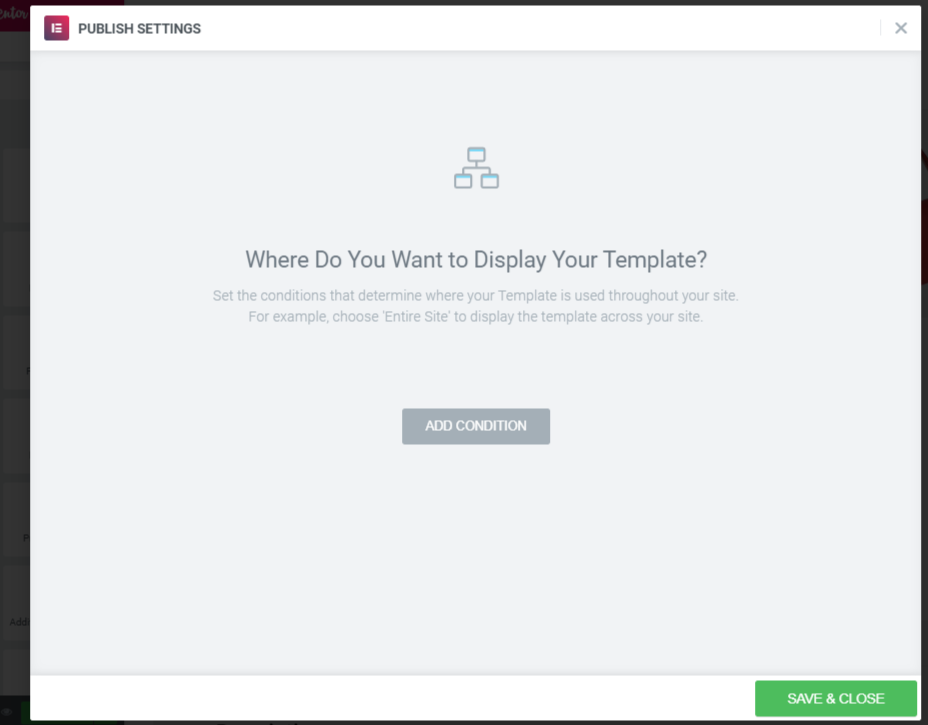
You will get a popup, then click “Add Condition” and then choose where you want that Product page template to deploy automatically.
After you click on the Add condition, you will get the option with “include” or “Exclude”. This options allows you the complete comtrol on where you want this new template to deploy and where not to.
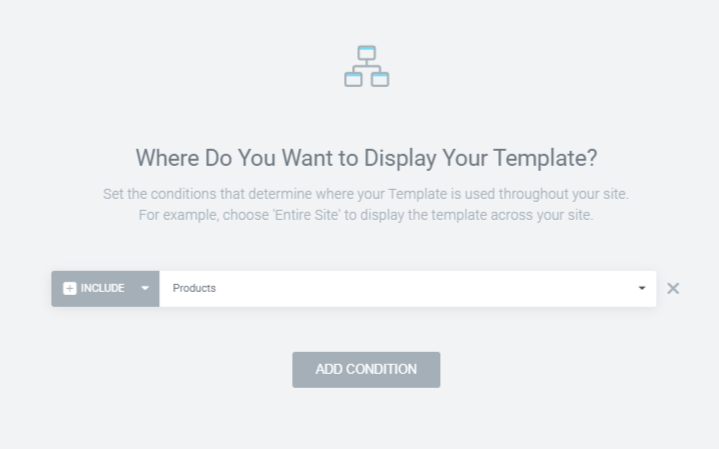
Since we are creating a custom Product Page for our WooCommerce. We will choose the “Products” option from the dropdown as “Include“.
And thats it, now click on “Save & Close“.
You have successfully created the Page Display condition and your page is ready to be deployed and used as the new Product page.
Step 7: Publishing the Page
This is the Last step of creating your Custom Product Page. Everything you did will not work if you don’t publish the page and make it available for the public.
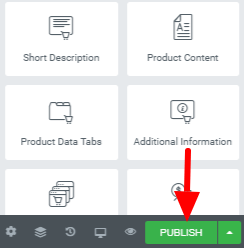
Hit the Publish button, and you have successfully completed your Custom Product Page Template.
Subscribe to our WooCommerce Guide by GloriousThemes, where you can enjoy exclusive video tutorials and free help from experts.
[optin-monster-shortcode id=”a9hjmpjcuohk0eabddi5″]
2. Using GloriousThemes
We know designing WordPress Themes and Templates is not easy for everyone and If you are in search for a good template or a WordPress service that can do this task for you.
Then GloriousThemes has great list of WordPress services that comes with an amazing support and a team of Experts that helps you to solve your problem.
They have been known and are popular for their works and has done several jobs on customizing and fixing WordPress.

Method A: Ordering their WordPress Services
This method is really simple and dead easy. Yes, I mean it, Its very easy.
Go to GloriousThemes.com/services and order their service pack. you have to order WooCommerce Design Customization pack.
After ordering, you will receive a mail from their team who will contact you and ask all the requirements you need for your WooCommerce Customization.
If you have an image for design, or a mock-up or want something like your competitor’s website. Just give them those details.
Their team will start working in their developing environment and will update you by providing a live url, which you can access to see the design and its changes.
Once you are happy with the design. They will deploy it to your Live website and test it for 100% surety, as their goal is to have 100% Customer Satisfaction.
After they make sure everything is working fine. They will ask your feedback and mark the task as completed.
That’s it. You don’t have to deal with any of the programming or designing hassles.
Method B: Buying a Theme or Template from GloriousThemes
GloriousThemes has several Templates and Themes for WordPress and WooCommerce and they also make Custom WordPress Themes.
You can either buy from their website or order a custom template or theme for yours.
So GloriousThemes WordPress services makes very easy for anyone to have best affordable WordPress services and a team of WordPress Experts in their hands.
3. Using Woolentor
Woolentor is a Elementor + Woocommerce Addons builder. Its the same thing as Elementor Pro Blocks thats helps your edit Woocommerce product page layout and customize woocommerce product page as per your likings.
Woolentor is best suitable for those who don’t want to use Elementor Pro and wants extra functionality for woocommerce.
Woolentor comes in 2 variants:
- WooLentor Free Version – Limited Resources ( Essential functions not available ).
- Woolentor Pro version – ( Complete Function to build a robust woocommerce website ).
Woolentor Pro has all this functions for a WooCommerce Website
- Product Tab
- Universal Product
- Add Banner
- Product Archive
- Product Title
- Related Product
- Add To Cart Button
- Additional Information
- Product data Tab
- Product Description
- My Account Order
- Thankyou Order
- Thankyou Customer Address
- Product Short Description
- Product Social Share
- Product Price
- Product Rating
- Product Reviews
- Product Image
- Product Upsell
- Product Stock Status
- Product Meta Info
- Product Archive Layout
- Product Cart Table
- Register Form
- My Account Logout
- Thankyou Order Details
- Available Stock Progress Bar New
- Product Cart Total
- Product Cross Sell
- Checkout Additional Information
- Checkout Billing Form
- Checkout Shipping Form
- Checkout Payment
- Checkout Order Review
- My Account Dashboard
- My Account Download
- My Account
- My Account Address
- Login Form
- Advance Product Image
Step 1: Download the Plugin
To completely customize woocommerce product page layout, we will need to have the pro version of Woolentor.
Woolentor has a free version, but I would suggest you to buy the pro version.
To Download the Woolentor Pro version, click the button below:-
After you have purchased and downloaded the woolentor Pro. You need to install woolentor.
- Go to www.yourwebsite.com/wp-admin
- Login and navigate to Plugins > Add New > Upload
- Select the Woolentor Pro .zip file, Click on Upload.
- Click on Activate.
So by now, your woolentor is ready to be used, but you need elementor for it to work. So install elementor free version.
- Go to www.yourwebsite.com/wp-admin
- Navigate to Plugins > Add New > Search
- Type elementor
- Click on Install,
- Then click on Activate.
The step:1 is done,
Step 2: Creating the Page
Create a Product Page also known as Woocommerce product template. To create a page for your woocommerce product, you need to follow this few steps.
- Go to your /wp-admin
- Navigate to Templates > Theme Builder > Product
- Create a New Page and name it – single Product
- Save The Changes.
- As you do this, it will open the page in the Elementor editor.
So, now the page is created, you need to design the page and add the widgets to the page.
[optin-monster-shortcode id=”a9hjmpjcuohk0eabddi5″]
Step 3: Designing the Page and Adding the Widgets
If you have Elementor Pro, then you have the power of importing the ready made templates with a click of a button.
But if you are using the Free version of Elementor, then you need to design the page from scratch and add the widgets to its respective position.

You will also get new set of block libraries from Woolentor. It will help you add new features, widgets, and custom post queries.
From the Elementor Editor panel, you have a search field, where you can quickly search for any widgets.
Type Woolentor and search for all the widgets it has. You can drag and drop any widget to design and make your custom WooCommerce Product page.
Watch our Video on how to use Woolentor WooCommerce Plugin.
Step 5: Previewing the Page with Another Product
After you have added the widgets and designed the page the way you wanted. You need to test its compatibility with other products, to make sure that it works exactly how it should be.
To change the product, you need to click the gears icon. As shown in the photo.

Then click on Preview Settings, and choose the first step as the “Product” and the second option is where you can choose another product for preview.
Click on Apply & Preview.
Now, the product is changed, Check if every widgets you added and the design is working properly.
You can make necessary adjustments and edit woocommerce product page if your page is not working properly. But if everything is working fine, proceed to Step-6.
Step 6: Set the Conditions and Publishing the Page
So now the final step is to set the condition of the page. It means where you want this page to automatically appear and work.
Normally if you have created a product page, you would want this page to replace your old product page and act as a new product page for all your woocommerce products.
To set the condition of the page.
Click the gear icon from the Elementor Editor Page.
Select the Display conditions,
This will open a new popup window.


Click on Add Condition, and select Products.

That’s how you customize woocommerce product page layout easily using elementor without writing a line of code.
Open your website in a new incognito tab and open a page and test if the new customize woocommerce product page is working properly.
Conclusion
If you want to regularly change and update the customers experience by customizing woocommerce product page. I would suggest you to go and buy Elementor Pro.
Elementor Pro is a fantastic page builder plugin that is currently the #1 page builder for WordPress.
Elementor gets regular updates and their developer keeps adding new features and communities most requested features, and the best part is that it also supports WooCommerce out of box.
It means you don’t need any other plugin for your Woocommerce store.
That’s all.
However, your needs may be different from mine. Which plugin is your favorite, and are you currently using it on your site? Do you have any other recommendations to add? Please voice your thoughts in the comments below!
You can also subscribe to our YouTube and Like and Follow us on Facebook, Twitter, and Instagram.
Woolentor is awesome plugin. It’s easy to use and free
Woolentor is awesome plugin. It’s easy to use and free
Yup, But i Prefer Elementor Pro