How To Make WooCommerce Checkout like Shopify
Shopify Checkout is one of the most optimized and clean checkouts in the industry. If you have ever used a Shopify store or bought something from a Shopify store then you must have seen its beautiful checkout system it.
Shopify uses a clean and user-friendly checkout process to increase the conversion rate of its stores.
To create a WooCommerce Checkout like Shopify, you need to install the CheckoutWC plugin and activate it. Then select the Copify theme and set it as the default checkout template. Now add your logo and the payment gateway. This is how you can get your Woocommerce Checkout like Shopify.
So, in this tutorial, I will show you, how you can create a Shopify styled checkout in WooCommerce without writing a line of code.
So, let’s get started.
3 Easy Steps to Make WooCommerce Checkout like Shopify.
- Get the Plugin ( No Coding Required ).
- Activate the Shopify template for the Checkout.
- Test your new checkout page.
Disclosure: I may receive affiliate compensation for some of the links below at no cost to you if you decide to purchase a paid plan. You can read our affiliate disclosure in our privacy policy.
1. Download the CheckoutWC plugin
There are several ways to make WooComemrce Checkout like Shopify. There are several tutorials that make you use several plugins and work with complicated processes to give you the style you want.
But the design is not well optimized in those methods and you have to do a lot of things to make your checkout page look and feel like Shopify.
But now, with this plugin CheckoutWC, you don’t need to write any code or design the page. All the design and code-related work has been done by the plugin developers and now all you need to do is to buy the plugin, activate it, and apply the template.
Visit this page, to download CheckoutWC plugin.
After you have downloaded the zip file, you need to install the plugin. To install CheckoutWC, Visit WP-Admin > Plugins > Add New > Upload the zip file.
Click on Install and then activate.
Now the next step is to verify your license and configure the plugin.
2. Customize the Checkout using CheckoutWC
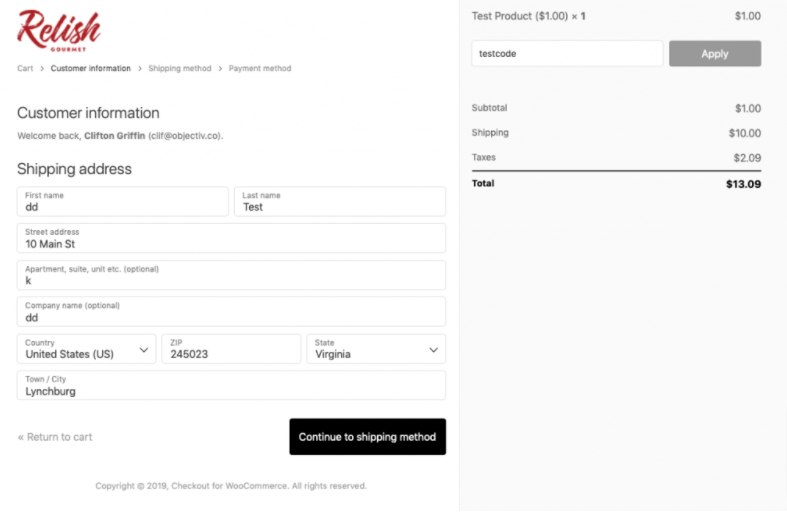
The plugin allows you to customize only after verifying the license code which you will get when you purchase the plugin. The license will be delivered to you on your email and you can also view it on your account.
The plugin allows you the following features.
- Four Beautiful Templates
- Easy to customize the color and feel.
- Mobile Responsive
- Express Checkout
- Cart Editing
- Thankyou Page
- Address Autocomplete
- Order Pay page
- Trust Badges
- Order Bumps
Let’s configure the checkoutWC Plugin.
After installing and activating the plugin, you will get these menu links.
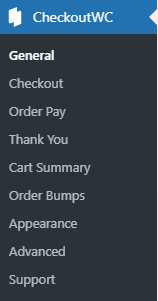
Click on the General, and you will get a new window something like this.
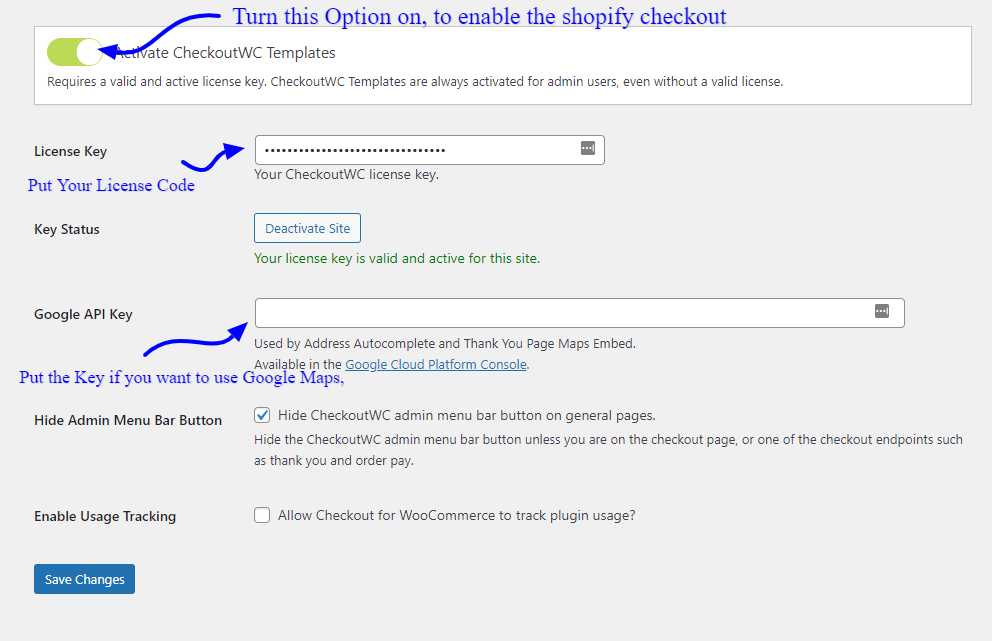
Turn on the CheckoutWC Template. After that select the Copify template and activate it.
The Copify template will make the default woocommerce checkout look like Shopify.
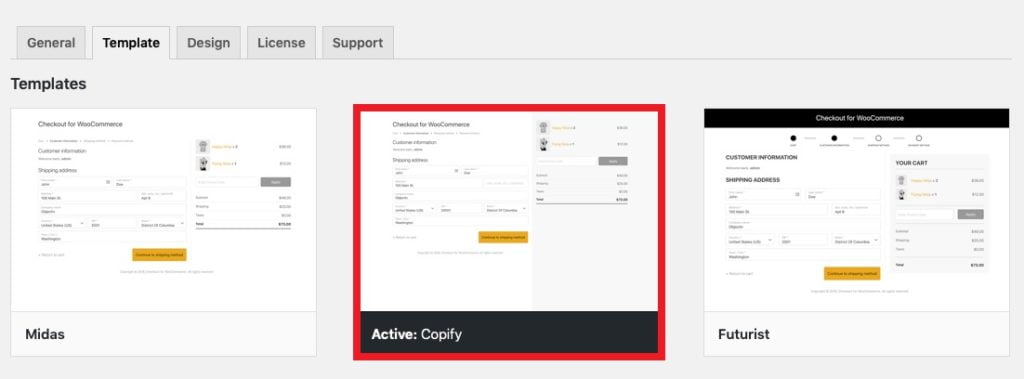
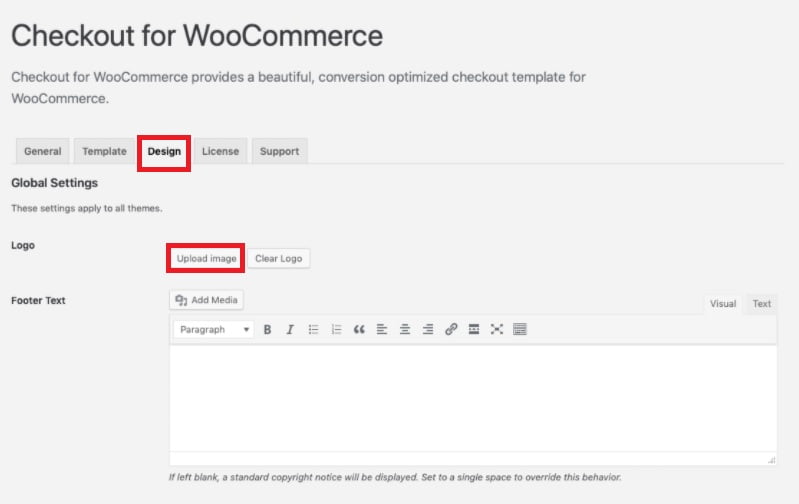
After that Click on the Design tab and Upload your Logo and you can also add any text that you want to appear in the footer.
The designing part is almost done. If you want to use the google maps autofill address for your customer address then you need to enter your google API which you can create in Google Projects Console.
You can also Enable the Hide Admin Menu Bar on checkout pages if the user is logged in during checkout..
Now you are all done, just click on the Save Changes button.
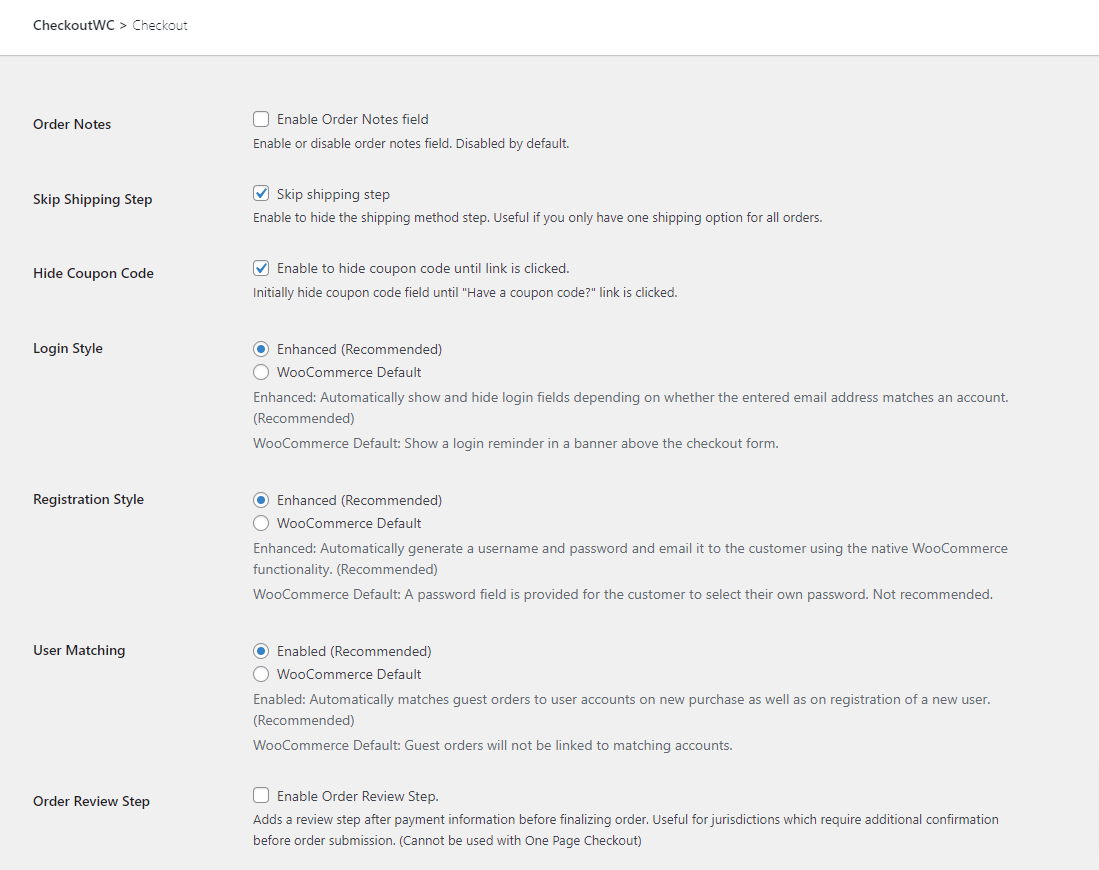
Checkouts
This is the additional settings field, these fields are not necessary however you use it to control the checkout page and optimize it for your cusomters.
To configure the checkout page. It depends on what features you want.
Free Plugin for Shopify Checkout Style
If you want to have a free plugin to get the shopify style for your woocomemrce then the WooCommerce Blocks is meant for you.
Note: Currently on Stripe and Cash on Delivery Payment Methods are supported with WooCommerce Blocks.
The style of WooCommerce Blocks Checkout is really beautiful and minimal, but the downside is that payment plugins are not yet supported in this plugin.
This means you must only use Stripe to accept payments online. This is a very big drawback as many users use different payment methods and companies to accept payment on their websites.
To activate the WooCommerce Blocks Checkout page. Go to Plugins > Add New > Search > WooCommerce Blocks > Install and Activate it.
Once activated, go to your checkout page and edit it and then select the woocommerce blocks checkout widget.
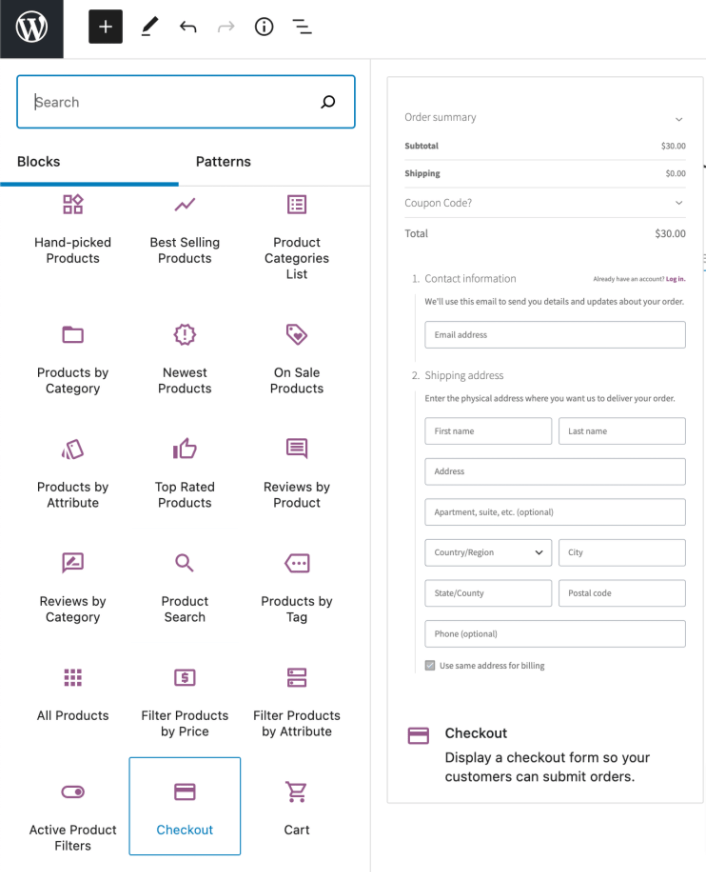
After you add the widget the Shopify styled Checkout page will appear and you can use it to accept payments from your customers.
Since the page is built with Gutenberg, you can use the WordPress page editor and edit the text and columns and change it to your taste.
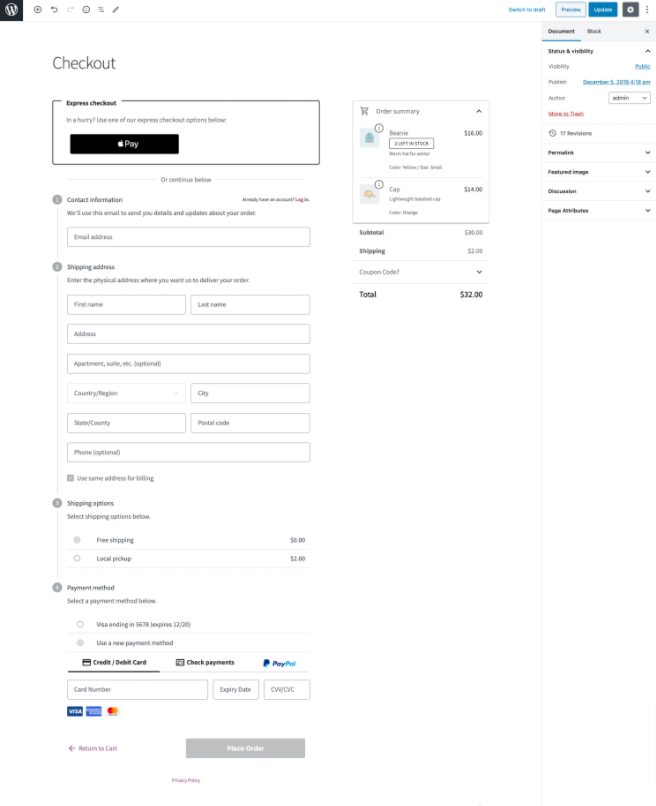
This is the free option on how you can use a beautiful WooCommerce checkout like shopify. But this option is good only for those who use Stripe payment as other payment doesn’t work properly with this block plugin.
Summary
I hope this tutorial has helped you to create your own Shopify Styled Checkout using WooCommerce.
We have tested several methods and plugins but found that CheckoutWC is the best plugin and the easiest method to get a Shopify styled checkout for WooCommerce.
That’s all.
However, your needs may be different from mine. Which plugin is your favorite, and are you currently using it on your site? Do you have any other recommendations to add? Please voice your thoughts in the comments below!
You can also subscribe to our YouTube and Like and Follow us on Facebook, Twitter, and Instagram.




Bonjour top merci ! Comment faire apparaitre la carte pour le choix du mondial relay (coché dans la livraison mais ne s’affiche pas)
Hi Lea,
Ask for the API details of Mondial Relay or contact the plugin developer of the Mondial Relay.
You can also hire WordPress developers to fix it
**TRANSLATED**
Salut Léa,
Demandez les détails de l’API de Mondial Relay ou contactez le développeur du plugin de Mondial Relay.
Vous pouvez également engager des développeurs WordPress pour le réparer